
So this is my worklog for my new pc. Ive been building PCs for a long time but as stated in the title this is my first water cooled setup and its going to be a custom single loop. Since the cost of this rig is going to pretty high I will be buying parts over the course of the next couple of weeks. So lets get started.
PC Parts and Pieces
Corsair obsidian Series 800D
Asus P8Z77-V PRO LGA 1155
2x Sapphire Radeon HD 7940 OC Version
Kingwin LZP-1000 1k WAtt Power supply
Intel cor i7-2600k Sandy Bridge 3.4 ghz
G.SKILL Ripjaws X Series 16gig DDR3 1600
2x Corsair Force Series GT SSD 240gig
Cooling Parts and Pieces
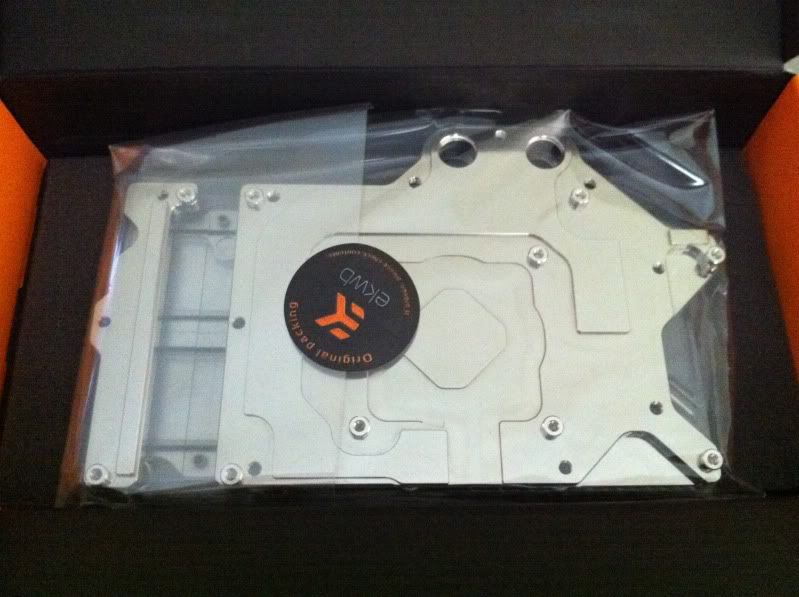
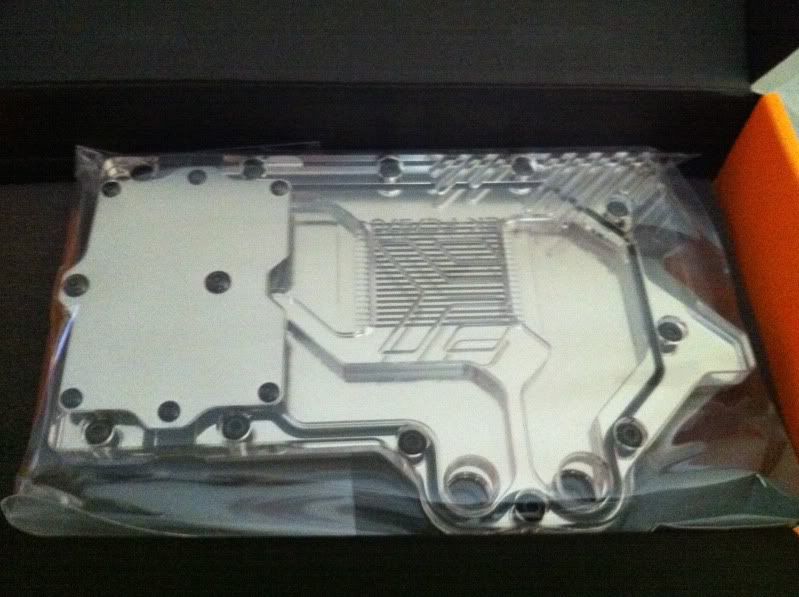
2x EK Radeon HD 7970 Liquid Cooling Blocks - Acetal and electroless Nickel Plated: Liquid Cooling
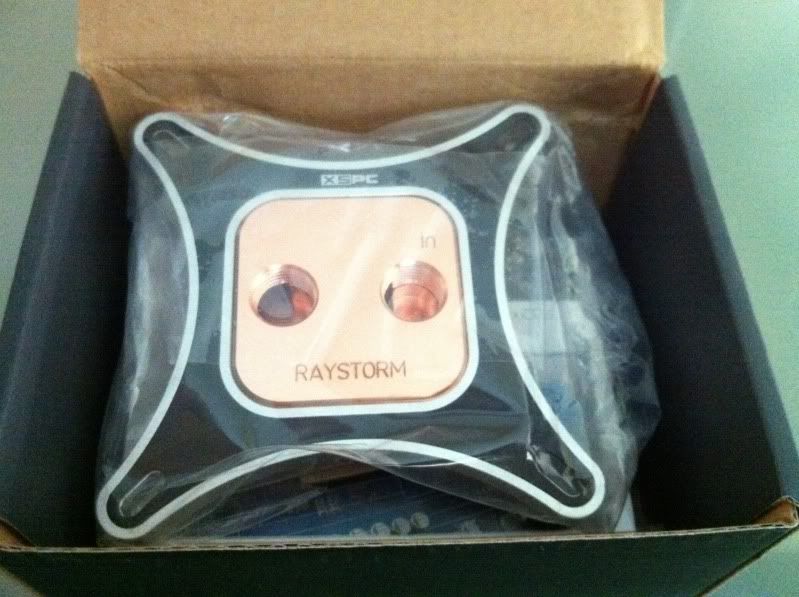
XSPC RayStorm high performance Acetal CPU Liquid Cooling Block, Special Copper Edition: Coppery
Bitspower 1/2 ID 3/4OD Compression fittings
Koolance Quick Disconnects
PrimoChill PrimoFlex Pro tubing
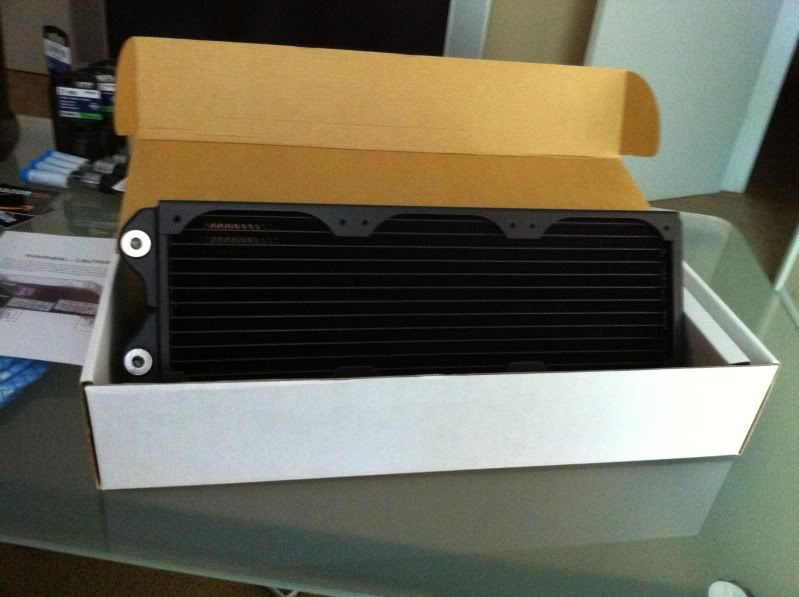
EK Ultimate Performance Coolstream 360 xtx series Radiator: Its Huge
EK Single Bay Reservoir
EK Ultimate Performance CoolStream 240 XTX series Radiator
EK DS X-Top Acetal Pump Rev.2 w/ Alphacool Variable speed pump
10x Scythe Gentle Typhoon 120mm - 1850 rpm
Ill be updateing the main post as parts come in, and posting new posts when I start assembly which should be in 2 weeks if all works out.
·English·Theme
- Forums
- Cross Site
- Computer Hardware & Troubleshooting
- First Water Cooling WorkLog
First Water Cooling WorkLogFollow
Alright so I finally have some updates. I ordered my two 7970s, some compression fittings, 10 feet of tubing and all of that has come in. Next week I will be ordering my case and my second radiator so I can work on mounting those. This update concerns mounting those sweet EK water blocks to my 7970s.
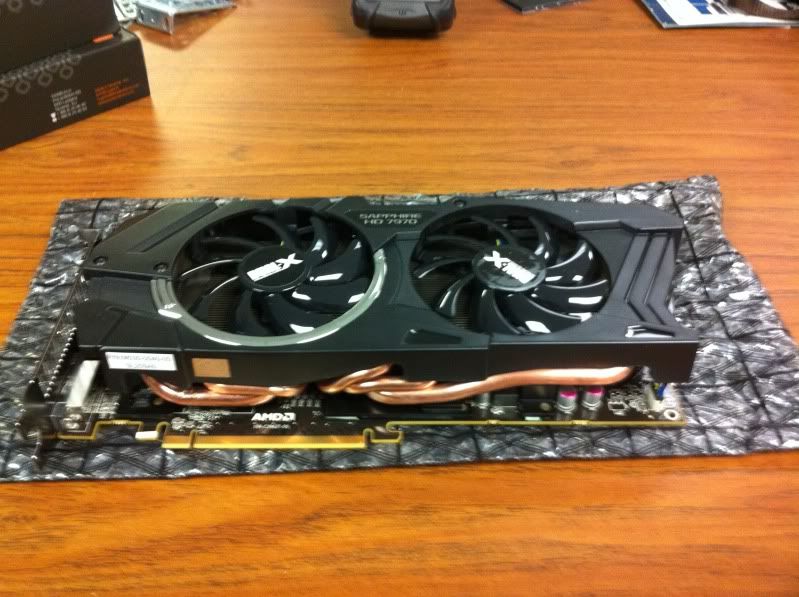
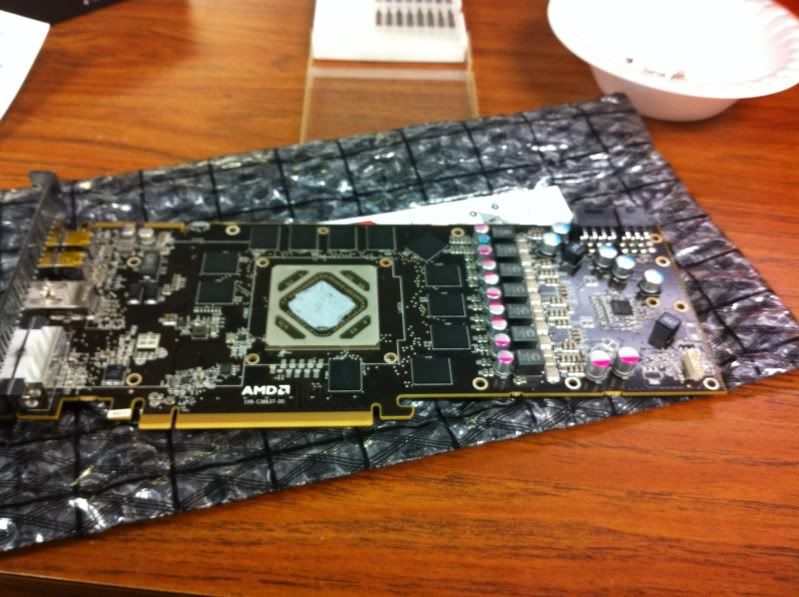
First of the goods: Sapphire Radeon 7970 OC Version
The cooler for this card is freaking gigantic and almost weighs about the same as the water block. With that being said let the dismantling begin. This part was easy, remove the two screws on the bracket then undo the screws on the back of the board. Normally once all the screws are undone it takes a bit of effort to actually remove the cooler from the board but mine literally just separated on its own while I was unscrewing the screws.
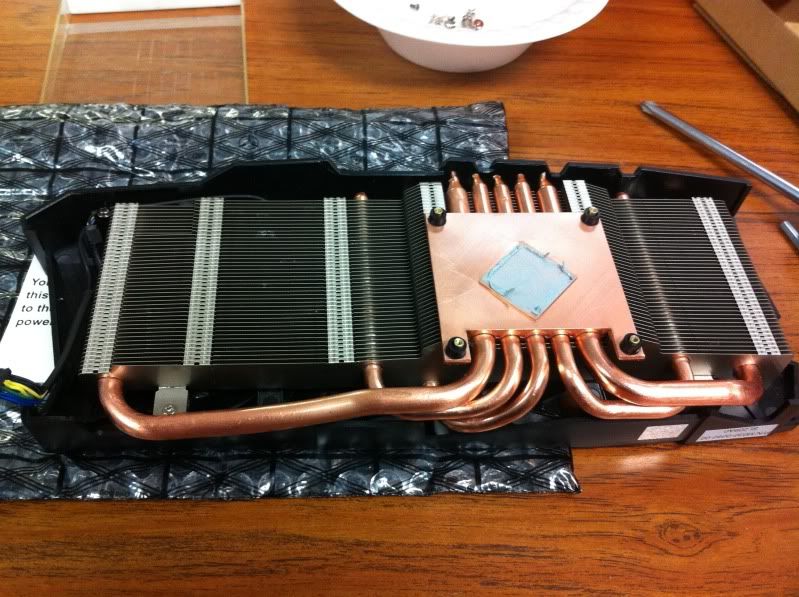
Cooler Removed 1 (heat-sink)
Cooler Removed 2 (PCB)
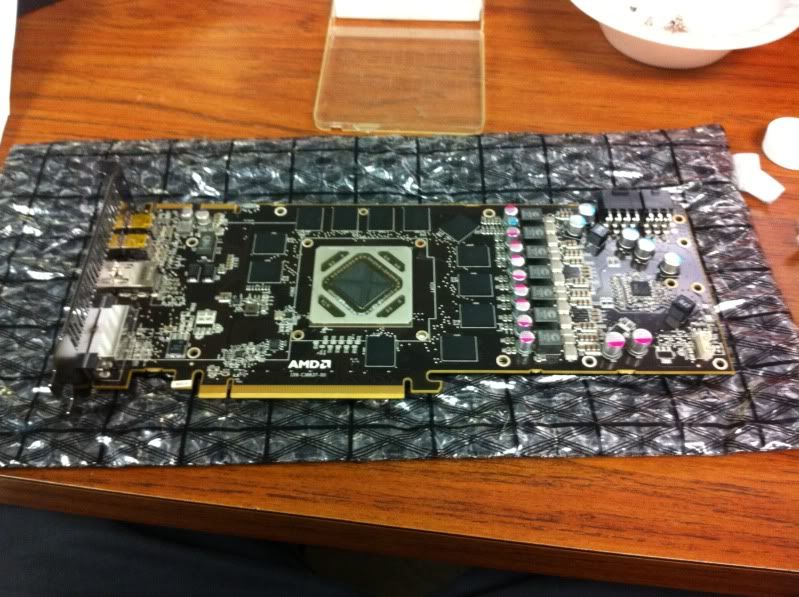
Now with this card you will notice that there are some heat sinks over the ram and such after you remove the fans and heat-sink. Those are held on by some of the screws you undo in the first step and simple pop off with a bit off wiggling.
One heat-sink off
Second one off
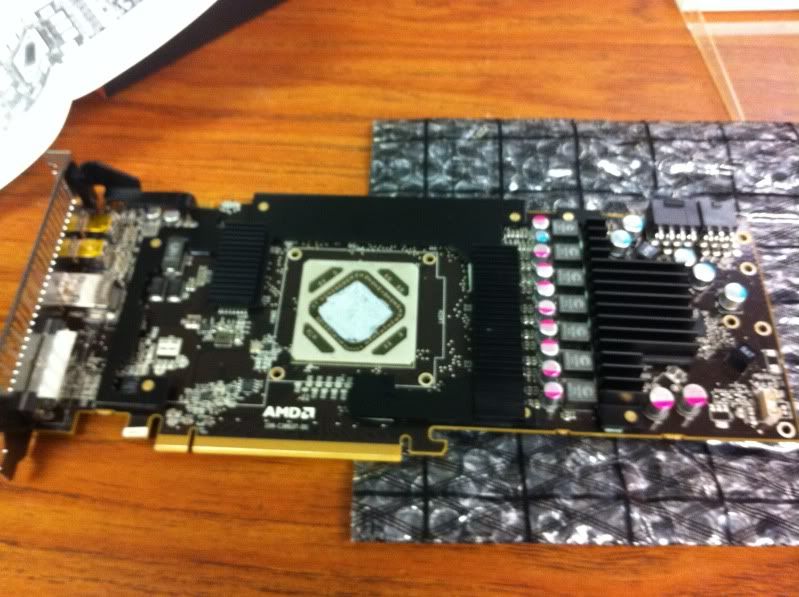
Tim cleaned off
Using some 70% iso wipes and some 91% iso and Kim wipes with some q-tips I cleaned up the board. Second one cleaned up a lot better then the first since there was a small amount of tim I could not access to remove.
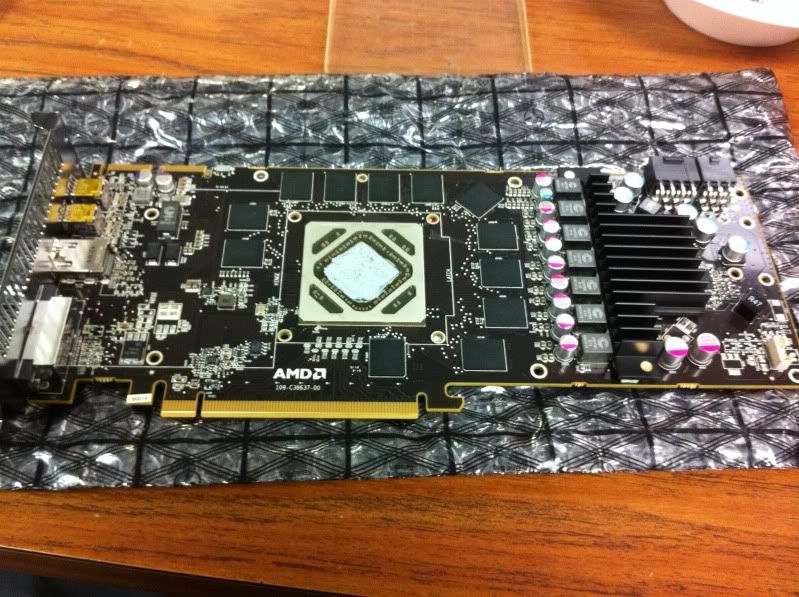
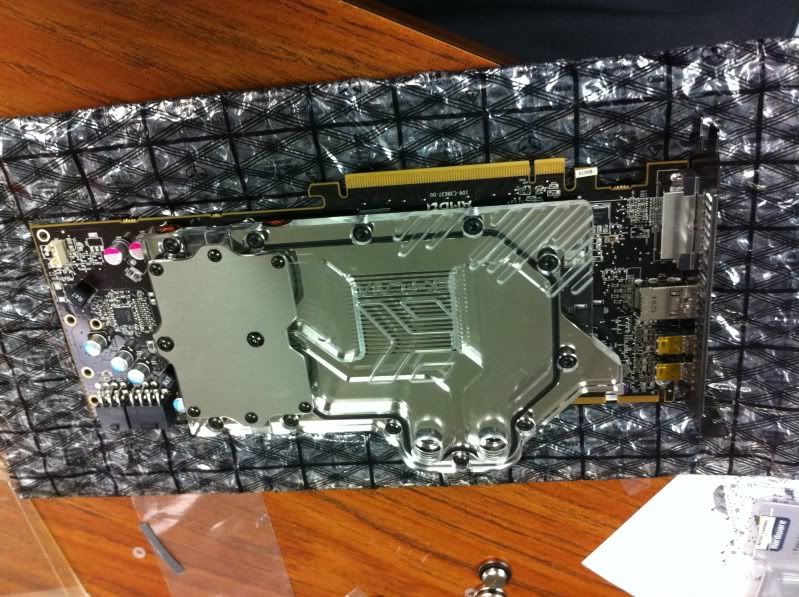
After cleaning I applied the thermal pads in the suggested area and applied some MX4. This probably took the longest since I made exact cuts for the thermal pads. For the MX4, I am a fan of the pea and rice grain in the middle way, though the instructions from EK say to make a cross. I compromised and made 4 small dots in a cross pattern.
Here is the finished product.
Edited, May 10th 2012 9:31pm by Alobont
First of the goods: Sapphire Radeon 7970 OC Version
The cooler for this card is freaking gigantic and almost weighs about the same as the water block. With that being said let the dismantling begin. This part was easy, remove the two screws on the bracket then undo the screws on the back of the board. Normally once all the screws are undone it takes a bit of effort to actually remove the cooler from the board but mine literally just separated on its own while I was unscrewing the screws.
Cooler Removed 1 (heat-sink)
Cooler Removed 2 (PCB)
Now with this card you will notice that there are some heat sinks over the ram and such after you remove the fans and heat-sink. Those are held on by some of the screws you undo in the first step and simple pop off with a bit off wiggling.
One heat-sink off
Second one off
Tim cleaned off
Using some 70% iso wipes and some 91% iso and Kim wipes with some q-tips I cleaned up the board. Second one cleaned up a lot better then the first since there was a small amount of tim I could not access to remove.
After cleaning I applied the thermal pads in the suggested area and applied some MX4. This probably took the longest since I made exact cuts for the thermal pads. For the MX4, I am a fan of the pea and rice grain in the middle way, though the instructions from EK say to make a cross. I compromised and made 4 small dots in a cross pattern.
Here is the finished product.
Edited, May 10th 2012 9:31pm by Alobont

Not a bad looking heat sync there!
Arch Duke Kaolian Drachensborn, lvl 95 Ranger, Unrest Server
Tech support forum | FAQ (Support) | Mobile Zam: http://m.zam.com (Premium only)
Forum Rules
Tech support forum | FAQ (Support) | Mobile Zam: http://m.zam.com (Premium only)
Forum Rules
Recent Visitors: 108
All times are in CST
Anonymous Guests (108)
- Forums
- Cross Site
- Computer Hardware & Troubleshooting
- First Water Cooling WorkLog
© 2024 Fanbyte LLC